
Caladiums, with their vibrant and varied leaf patterns, have captivated the hearts of garden enthusiasts worldwide. The art of propagating Caladiums holds a special allure. It’s not just about creating new plants; it’s a journey of discovery and connection with nature. Propagation ensures the continuity of these beautiful varieties, allowing gardeners to expand their collection and share with others.
Whether you’re a seasoned gardener or a curious beginner, learning to propagate Caladiums opens up a world of horticultural possibilities. It’s a process that’s both rewarding and surprisingly straightforward, making it accessible to everyone who wishes to delve into the world of plant propagation.
Understanding Caladiums: Characteristics and Varieties
Caladiums are distinguished by their heart-shaped leaves, which come in a mesmerizing array of colors and patterns.
These plants belong to the Araceae family and are primarily known for their decorative leaves rather than their flowers. The leaves can range from pure white to deep red, with various shades of pink, green, and even almost-black hues.
The patterns can be speckled, veined, or solid, making each Caladium unique.
There are over 1000 named cultivars of Caladiums, each with its distinct charm.
Here’s a table highlighting some of the popular varieties:
| Variety Name | Description | Color Patterns |
|---|---|---|
| ‘Florida Sweetheart’ | Compact and ideal for containers | Pink leaves with green edges |
| ‘Moonlight’ | A luminous choice for shady areas | White leaves with thin green veins |
| ‘Red Flash’ | Adds a dramatic touch | Deep red leaves with green borders and pink spots |
| ‘Strawberry Star’ | Perfect for a pop of brightness | White leaves with strawberry-red speckles |
| ‘Miss Muffet’ | Small and versatile | Lime green leaves with red freckles |
Each variety has its specific growth habits and preferences, making them suitable for different gardening styles and environments.
Whether grown in pots, as part of a mixed border, or in a shaded garden bed, Caladiums offer a spectacular display of colors and patterns, bringing life to any garden space.
Step-by-Step Guide to Propagating Caladiums
Propagating Caladiums is a straightforward process that, when done correctly, can yield a bounty of beautiful new plants.
Here’s a detailed guide to help you through each step:
Preparing for Propagation:
- Select Healthy Parent Plants: Choose robust Caladium plants with healthy tubers. This increases the chances of successful propagation.
- Gather Necessary Supplies: Ensure you have a sharp, sterilized knife or garden shears, potting mix, pots or trays, and a watering can or spray bottle.
Detailed Steps for Successful Propagation:
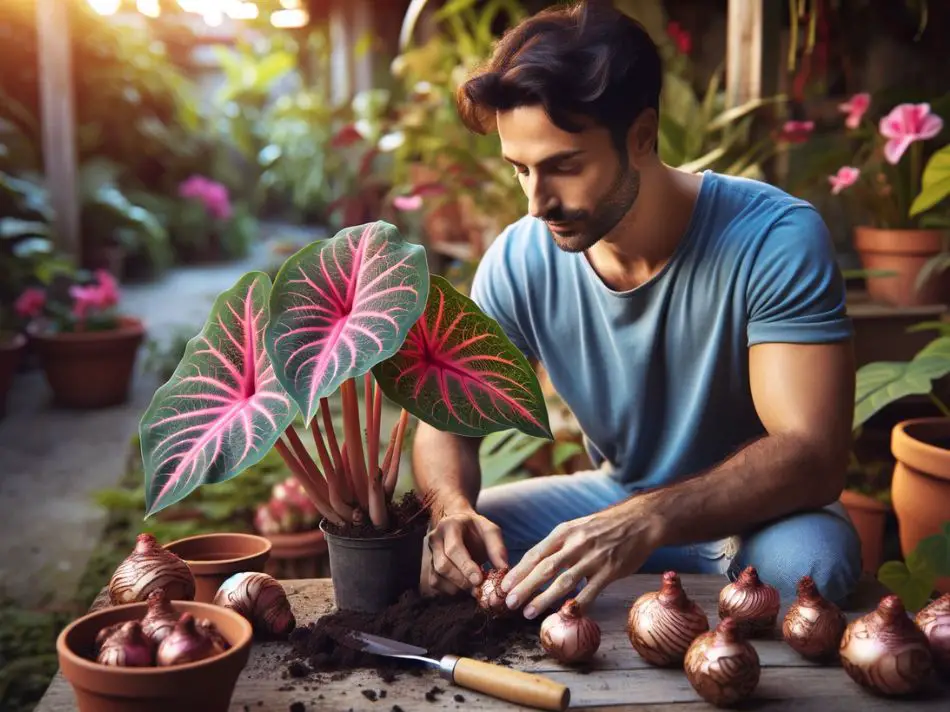
- Unearth Tubers: Carefully dig up the Caladium tubers from the parent plant after the foliage has died back. Clean off any soil gently.
- Inspect and Cut Tubers: Look for the ‘eyes’ or growth points on the tubers. Using your sterilized knife, cut the tuber into sections, making sure each piece has at least one eye.
- Let Cut Tubers Dry: Allow the cut surfaces of the tubers to dry for a few hours to prevent rot.
- Plant Tubers: Fill pots or trays with a well-draining potting mix. Plant the tuber sections about 2 inches deep, with the eyes facing upwards.
- Initial Watering: Water the newly planted tubers lightly, ensuring the soil is moist but not waterlogged.
- Provide Optimal Conditions: Place the pots in a warm area with indirect light. Avoid direct sunlight and maintain a consistent temperature.
Propagation Timeline
| Stage | Duration | Care Tips |
|---|---|---|
| Planting | Day 1 | Plant tuber sections in moist soil, water lightly. |
| Germination | 2-4 weeks | Keep soil consistently moist, provide indirect light. |
| Initial Growth | 4-8 weeks | Maintain humidity, water as topsoil dries. |
| Transplanting | 8-12 weeks | Transplant to larger pots if necessary, begin regular feeding. |
| Mature Plant | 3-6 months | Regular care, adjust watering based on growth. |
By following these steps and adhering to the timeline, you can successfully propagate Caladiums and enjoy their stunning foliage. Each stage requires specific care to ensure the healthy growth of your Caladiums.
Advanced Tips and Tricks for Propagating Caladiums
For those who have mastered the basics of Caladium propagation, there are advanced techniques and tips that can further enhance the success and quality of your propagated plants.These methods are particularly useful for experienced gardeners looking to refine their propagation skills.
- Temperature Control: Caladiums are sensitive to temperature. Using a heating mat under your propagation trays can provide a consistent and optimal temperature, especially in cooler climates. This encourages faster and more uniform germination.
- Humidity Domes: Maintaining high humidity can significantly improve the success rate of propagation. Using humidity domes over your trays helps in retaining moisture and creating a mini greenhouse effect.
- Selective Pruning: As new plants grow, selectively pruning the foliage can encourage more robust growth. This technique involves removing some leaves to allow the plant to focus its energy on developing a strong root system.
- Soil Amendments: Experiment with different soil mixtures to find the perfect blend for your Caladiums. Adding perlite or vermiculite can improve soil drainage and aeration, which is crucial for healthy root development.
- Hydroponic Propagation: For a more experimental approach, try propagating Caladiums hydroponically. This soil-less method can result in quicker root development and allows for easier monitoring of root health.
- Foliar Feeding: Applying a diluted, balanced fertilizer directly to the leaves can provide an additional nutrient boost, especially during the critical stages of early growth.
By incorporating these advanced techniques into your propagation routine, you can enhance the growth and vitality of your Caladiums, leading to even more spectacular displays of their colorful foliage
Caring for Caladiums Post-Propagation

After successfully propagating Caladiums, the next crucial phase is their care and maintenance. Proper care ensures that the young plants develop robustly and display their full ornamental potential. Here are key aspects to consider in post-propagation care:
1. Optimal Lighting: Caladiums thrive in bright, indirect light. Too much direct sunlight can scorch their delicate leaves, while insufficient light may lead to less vibrant colors. Find a balance that suits the specific variety of Caladium you are growing.
2. Watering Needs: Keep the soil consistently moist but not waterlogged. Overwatering can lead to root rot, especially in young plants. A good rule of thumb is to water when the top inch of soil feels dry to the touch.
3. Temperature and Humidity: These tropical plants prefer warm and humid conditions. Maintain a temperature range between 70-85°F (21-29°C) and consider using a humidifier or a pebble tray to increase humidity, especially in dry indoor environments.
4. Fertilization: Feed young Caladiums with a balanced, water-soluble fertilizer every four to six weeks during the growing season. This will support their vigorous growth and vibrant leaf coloration.
5. Pest and Disease Management: Keep an eye out for common pests like spider mites and aphids. Use insecticidal soap or neem oil for treatment. Also, ensure good air circulation around the plants to prevent fungal diseases.
Frequently Asked Questions About Caladium Propagation
When it comes to propagating Caladiums, gardeners often have a variety of questions. Addressing these common queries can help clarify the process and improve success rates.
Here are some of the top frequently asked questions with concise answers:
While less common, it is possible to propagate Caladiums from leaf cuttings, provided a part of the tuber is attached. This method requires careful handling and optimal growing conditions.
A propagated Caladium typically takes 3 to 6 months to reach maturity, depending on the growing conditions and care provided.
Yes, Caladiums propagated from tubers generally produce plants that are true to the parent in terms of color and pattern.
Water newly propagated Caladiums when the top inch of soil feels dry. Overwatering can lead to root rot, so it’s important to maintain a balance.
The best time to propagate Caladiums is in late winter or early spring, just before the growing season begins. This timing allows the plants to establish themselves during the optimal growing period.
Conclusion: Embracing the Joy of Propagating Caladiums
Propagating Caladiums is more than just a gardening task; it’s an enriching experience that connects us with the beauty of nature. By mastering this art, gardeners can expand their collection and share these stunning plants with others.
Embrace the joy and satisfaction that comes from watching your propagated Caladiums flourish and transform your garden into a vibrant tapestry of colors.
